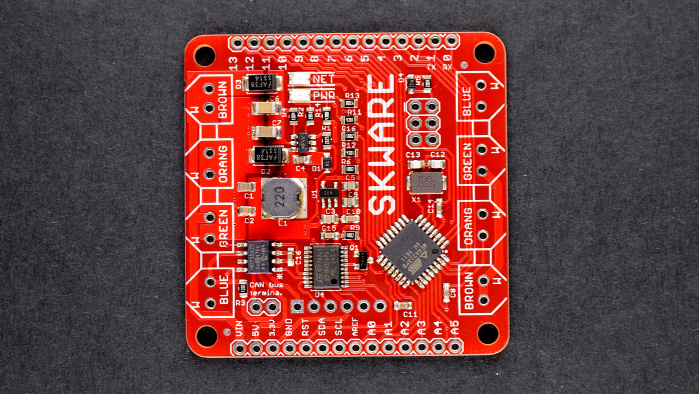
I've been taking pictures of circuits as part of the (now defunct) Omzlo One Kickstarter and The Castle of Lucretia (1997) Porn Moviethe new follow-up "Skware" CAN-bus IoT project we are building. I've started to develop a strange pleasure for taking pictures of PCBs and I thought I'd share my experience. Sure, you can take pictures of PCBs with your smartphone and get nice results. However, if you want repeatable quality and acceptable color, you don't need to break the bank but you will need a bit more gear.
Editor's Note:
Guest author Alain Pannetrat is a self-described digital electronic fanatic who is currently working on an open-source/open-hardware Arduino-compatible IoT platform based on CAN-bus. You can follow Alain at his website Omzlo.com as well as Twitter and Github.
My recommended setup has only 3 elements:
In fact, you don't even need a DSLR. Any advanced point-and-shoot camera that has a zoom should work just as well. Warning:If you're an advanced photographer with professional lighting, macro lens and a studio, this article might hurt your eyes.
Now we can walk through taking pictures of PCBs in 7 steps:
All those steps may sound like a lot of work, but once you establish your routine, it just takes a few seconds to make a shot and a few more minutes with GIMP before you can upload your new project picture to your favorite website.
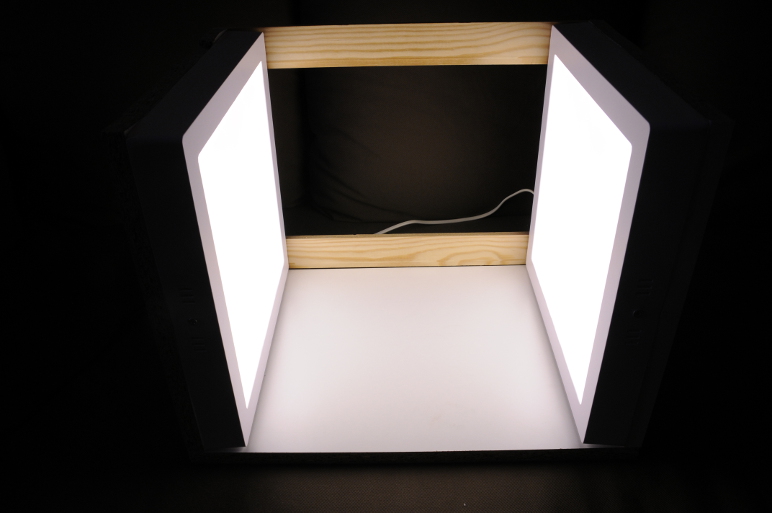
To take pictures of PCBs or products in general, it's good to have a diffused soft light source that comes from all directions uniformly. You want to reduce shadows as much as possible. A strong directional light will often create shadows, hiding details of your PCB, such as pins or components.
The solution is to use a light box, which is typically a box made of a white translucent material which is illuminated from the outside in order to give objects inside the box uniform lighting (see here for an example). There are plenty of tutorials on the net for building a light box. Just Google "diy light box".
I built mine with 2 cheap outdoor square led panels and some scrap wood. The led panels produce diffused light and are placed on each side of a square box. The picture below shows the assembly almost finalized.
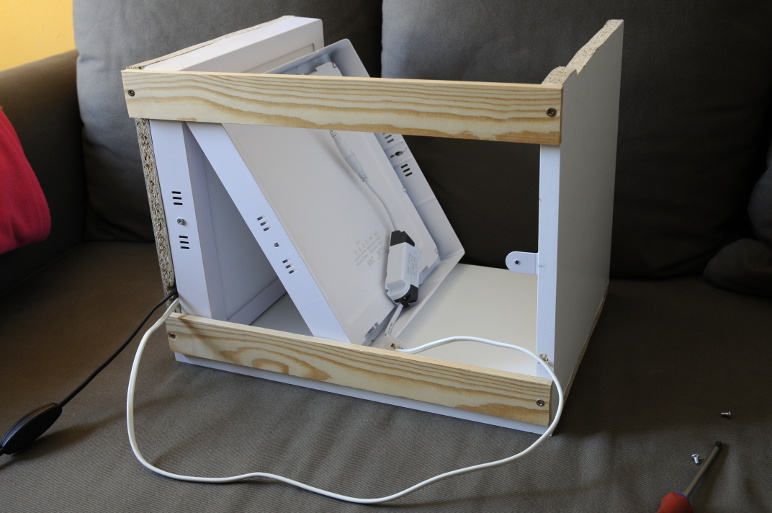
The led panels are directly plugged into the wall and can be switched on or off like a desk light. This setup is simple, solid, self-contained and easy to move around, which perfect in our small garage lab.
When taking pictures of PCBs, you typically have two options for a background: blackor white. This is a matter of personal taste and style, but I found that there are minor pros and cons for each.
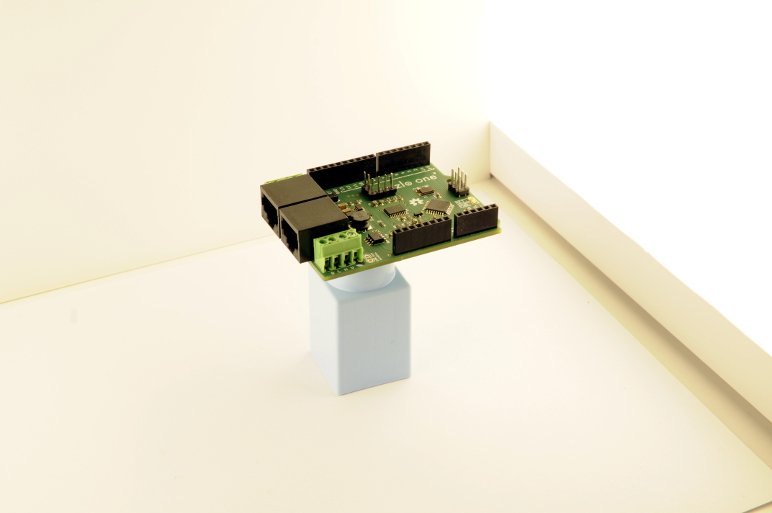
White backgrounds are ubiquitous in electronics: see SparkFun for example. The advantage of a white backgroundis that it's easy to remove later in GIMP to create a transparent background. You can then create a transparent PNG/GIF image of you PCB and merge it with an existing background on a web page. On the downside, a white background will be very sensitive to any projected shadow from your PCB. To avoid projected shadows, it's best to avoid resting the PCB directly on the background: raise it on a small object, to create a distance with the background, as shown in the picture below.
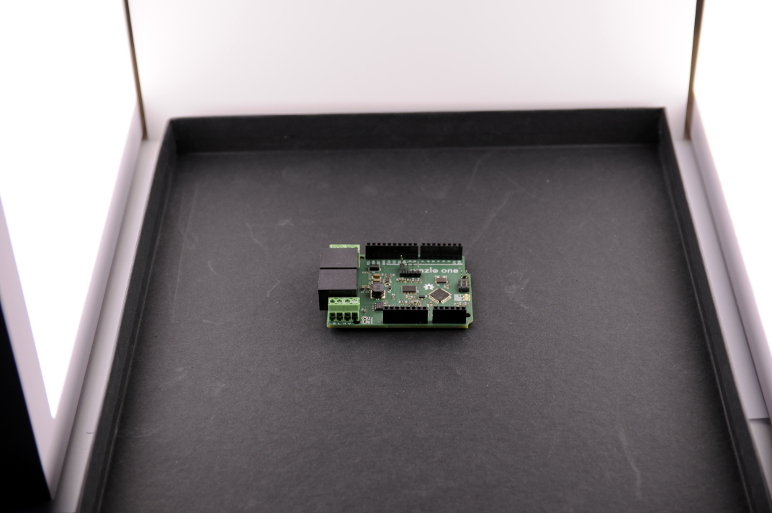
Black or dark gray backgrounds give your picture a more specific style, check out Adafruit for example. They are less flexible in terms of integration in web pages. On the other hand, they are also more forgiving of shadows: you can directly rest your PCB on the background without much worry as shown on the picture below.
Most cameras today are quite smart and they will automatically calculate the correct exposure for your shot. Beware that in some cases, the use of a black or white background can confuse your camera. A white background can cause your PCB to look too dark, while a black background may cause your PCB to look too bright. If this is the case, you can typically set your camera to underexpose or overexpose the shot a little to correct the problem.
When taking a portrait of somebody with a camera, rather than getting close to the subject, it's best to zoom as much as possible and step away as much as needed to frame the person's face in the camera. This gives much more flattering results by reducing distortions. The same applies to taking pictures of PCBs.
The actual zoom focal length range of a camera is influenced by several factors including the sensor size and the optics of the zoom. A detailed discussion of focal length is beyond the scope of this blog entry: just zoom as much as possible! My DSLR has a zoom with a focal length that goes from 17mm to 50mm, on an APS-C sensor (equivalent to 26 to 75mm on a 35mm film frame). I always zoom all the way to 50mm to take a picture of a PCB.
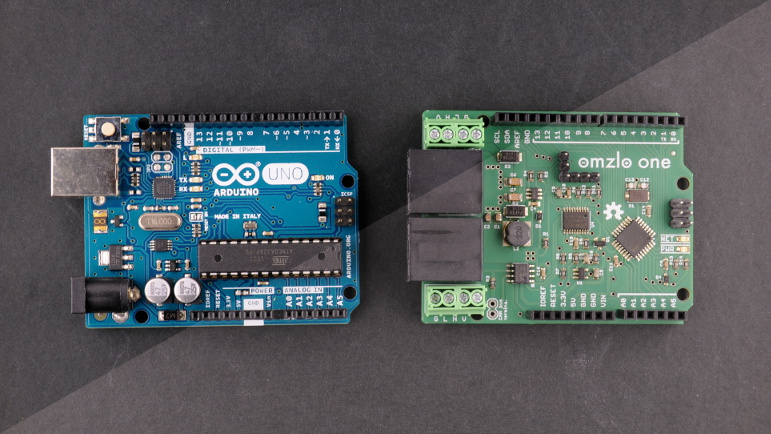
The picture below shows roughly the same picture taken with two different focal lengths. On the right, the picture is taken with a 12mm focal length, using a wide angle lens. On the left, the picture is taken with a 50mm focal length, using my zoom at maximum focal length. As you can see, the picture on the right has much more distortions: pin headers seem to be bending outwards.

You could argue that the picture on the left has still a bit of distortion, but I think it's good enough for showcasing a PCB.
You want all of your PCB to appear in focus. The depth of field – the depth of what appears in focus on the picture – is controlled by the aperture on your camera. You want to reduce the aperture while maintaining a reasonable shutter speed. If it sounds gibberish to you, just look at your camera settings display:
You want the aperture number to be as high as possible: higher means a smaller aperture. But there is a link between speed and aperture: the smaller the apertures, the lower the speed. And when the speed gets too low, the camera will record the involuntary movement of the photographer, resulting in a blurry picture. As a rule of thumb, you don't want to go much below a speed of 1/50th of a second.
The picture below shows the same picture with 2 different apertures:
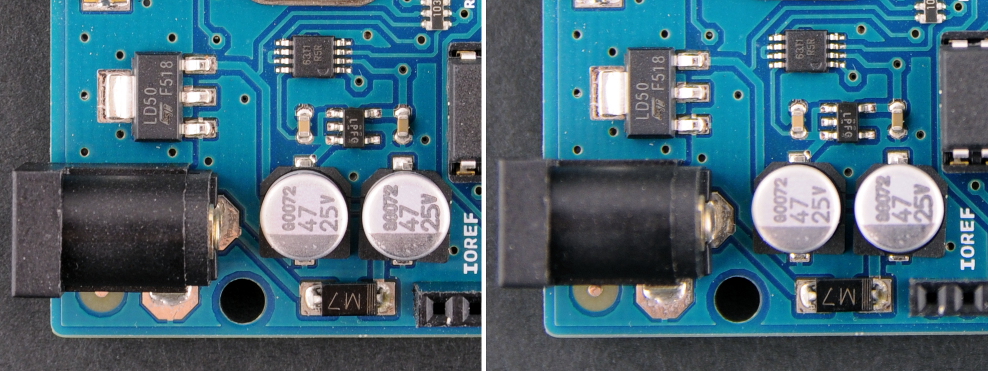
While both pictures show the circuit board in good detail, the picture on the right has less depth of field. Some components such as the DC barrel jack or the bottom female headers are a bit blurry.
On DSLRs and advanced point and shoot, you can set the camera in a mode where you can control the aperture: it's typically called mode "A". I usually pick an aperture between f/8 and f/11, which results in a speed between 1/50th and 1/100th of a second with my light box. Stronger lights will give you more flexibility.
Now you put you PCB in the light box, take a picture and view the corresponding JPEG file on your computer. In some cases, you might be surprised that the image has a strong color cast: it might look more yellowish or blueish than what you "saw" when you took the picture...
There are several reasons for this difference. The light you use in your light box is not perfect, it is a far cry from real natural light, especially if you use cheap led panels like I do. The camera may have made a wrong "guess" about the light source. Your brain will also fool you. Your computer screen might also be off a bit as well...
You can correct this color cast in GIMP to a certain degree, but it's better to minimize it from the start. To do that, you will need to set the White Balanceof your camera (often abbreviated as "WB"). I've found that trying out the predefined settings of the camera until one works reasonably well is enough (Auto, Tungsten, Fluorescent, ...).
Now it's time to take the picture. Switch on the light box and eliminate all other sources of light. Close windows and doors. Switch off the room ceiling light. This will eliminate parasite light sources that may confuse your camera. This is very important.
Center the PCB in the frame, stay steady and press the shutter!
GIMP is a free and open source image editor that works on Windows, macOS or Linux. There are plenty of online resources available on how to install and use this tool. If you are a photographer, there are much better proprietary alternatives out there, but it's hard to beat the price of GIMP and it has all the basics you need.
So you took your picture, you can now upload the resulting JPEG file in GIMP to make some final corrections, namely:
The only tool I use for color correction is the levelstool in GIMP, which you can find in the "colors" menu, as shown below.
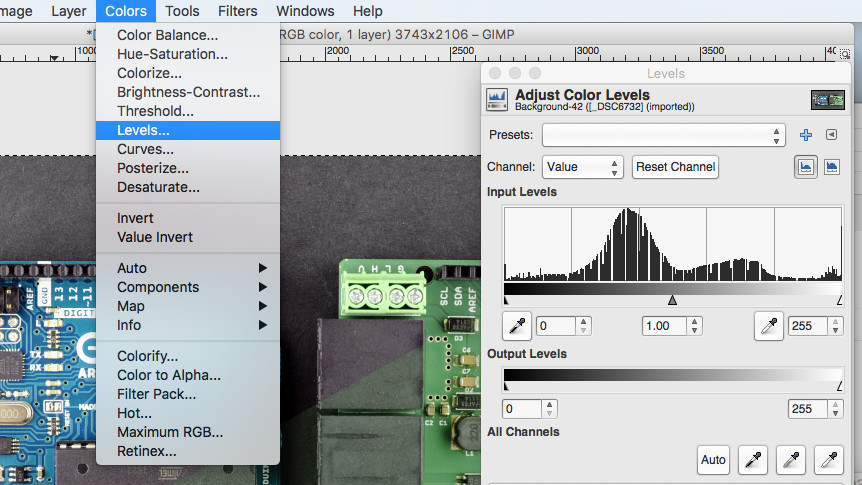
In many cases, it's enough to click on "Auto" to adjust the color and contrast of the picture: you're basically done. For other cases, I use the white point and black point "pipette" icons that are sitting next to the "Auto" button in the levels dialog box shown above:
The picture below shows an example of a correction applied. The lower right part of the picture is unprocessed while the upper left area is corrected.
Once color correction is applied, it's time to crop the picture if necessary to let the PCB fill the frame well enough.
By following the simple steps above, I've developed a pretty satisfactory approach to taking pictures in our projects. Of course, it's not perfect but it's simple enough.
There are some easy improvements to this process:
And you, what are your tips and tricks for taking pictures of your electronic projects?
 Best robot vacuum deal: Get the Roborock Q5 Max for 53% off at Amazon
 Beyoncé is promoting a plant
 Beijing to support unicorns by fast
 Wordle today: The answer and hints for April 26
 NYT Strands hints, answers for May 18
 Huawei raises shipment target for the Mate 60 series by 20% · TechNode
 Xiaomi 14 with Snapdragon 8 Gen 3 to launch in October · TechNode
 Threads launches 'hidden words' feature to customize feed
 The State of PC Gaming in 2016
 China and the EU discuss AI and cross
 Contingent No More
 Mark Zuckerberg has found a new sense of style. Why?
 Indonesian minister says Geely agrees to build homegrown EV brand in the country · TechNode
 Save $50 on the Fitbit Versa 4 Smartwatch
 A worthless juicer and a Gipper-branded server
 Huawei to hold launch event on the anniversary of Meng Wanzhou’s return from Canada · TechNode
 Beijing to support unicorns by fast
 How wild bioacoustics recorded in rainforests help conservationists
 New MIT report reveals energy costs of AI tools like ChatGPT
 Elon Musk shows off SpaceX's Starship Raptor engine firing
Tolstoy Goes Digital, and Other News by Sadie SteinHow to save disappearing messages on WhatsappHow to add custom emoji to SlackPynchonicity by Gary LippmanHow to add mentions in an Instagram Story after it's postedEmmy nominations 2023: How and when to watchHow to save disappearing messages on WhatsappNabokov on Joyce by Sadie SteinFifth Business by Brian CullmanWordle today: Here's the answer and hints for July 10My Nothing to Hide by Amy Grace LoydGathering the Poems Together: A Conversation with Gregory Orr by Alex DuebenBukowski on File, and Other News by Sadie SteinUpdate your Mac, iPhone and iPad right now to fix critical security holeHow to delete your Amazon accountHow to add mentions in an Instagram Story after it's posted'Quordle' today: See each 'Quordle' answer and hints for July 12Politics on dating apps are thornier than ever now that Trump is goneIndiana Jones and the Missed Opportunity: The Search for Marion RavenwoodHow to add custom emoji to Slack Huawei sues Verizon for allegedly using patents without permission Natalie Portman's Oscars outfit recognized snubbed female directors Mac Pro with 1.5TB of RAM tackles Google Chrome and its insatiable lust for memory First seeds from indigenous American tribe added to the doomsday vault Enjoy those Uber Select rides while you can Report claims U.S. government is using cellphone location data to track undocumented immigrants Olympic torch relay to begin with a female athlete for the first time ever. Yes, it's 2020. Comedian tweets the perfect response to news story about his own death Joaquin Phoenix's Oscar speech talks about fight against injustice 'P.S. I Still Love You' is a worthwhile sequel to 'To All the Boys' Billie Eilish looking confused AF at the Oscars is a real meme mood The best and worst moments of the 2020 Oscars Mitsubishi's LED skylights are perfect for the subterranean apocalypse Kendall Jenner had some words about that Pepsi commercial before any of us saw it, and, welp... The 6 most emotional moments from the final season of 'Bojack Horseman' John Mulaney, Daniel Craig will host 'Saturday Night Live' again Netflix’s enticing ‘Locke & Key’ adaption is a fresh take on the beloved comic book series Sad internet man Ted Cruz tells Twitter to ban Iran's Supreme Leader Stop creating cutesy buzzwords for asshole online dating behavior New York City just took a major step toward equal pay
2.2239s , 10203.484375 kb
Copyright © 2025 Powered by 【The Castle of Lucretia (1997) Porn Movie】,Openness Information Network